

Stretched and gridded

Pencil

Pencil
Pencil

Pencil

Pencil

Pencil

Ink

Ink

Watercolor

Watercolor


Final touches

so close

Stretched and griddedI use 140 lb. watercolor Fabriano paper made out of 100% cotton from large rolls. But I can't just unroll it and start drawing. I have to cut and stretch it first, or it will never lie flat. Stretching takes a day and includes soaking the paper on both sides several times. When it finally dries it's stretched and ready to work on. I start by drawing a diamond grid (you can see it here) for a guide before I start drawing the walls.
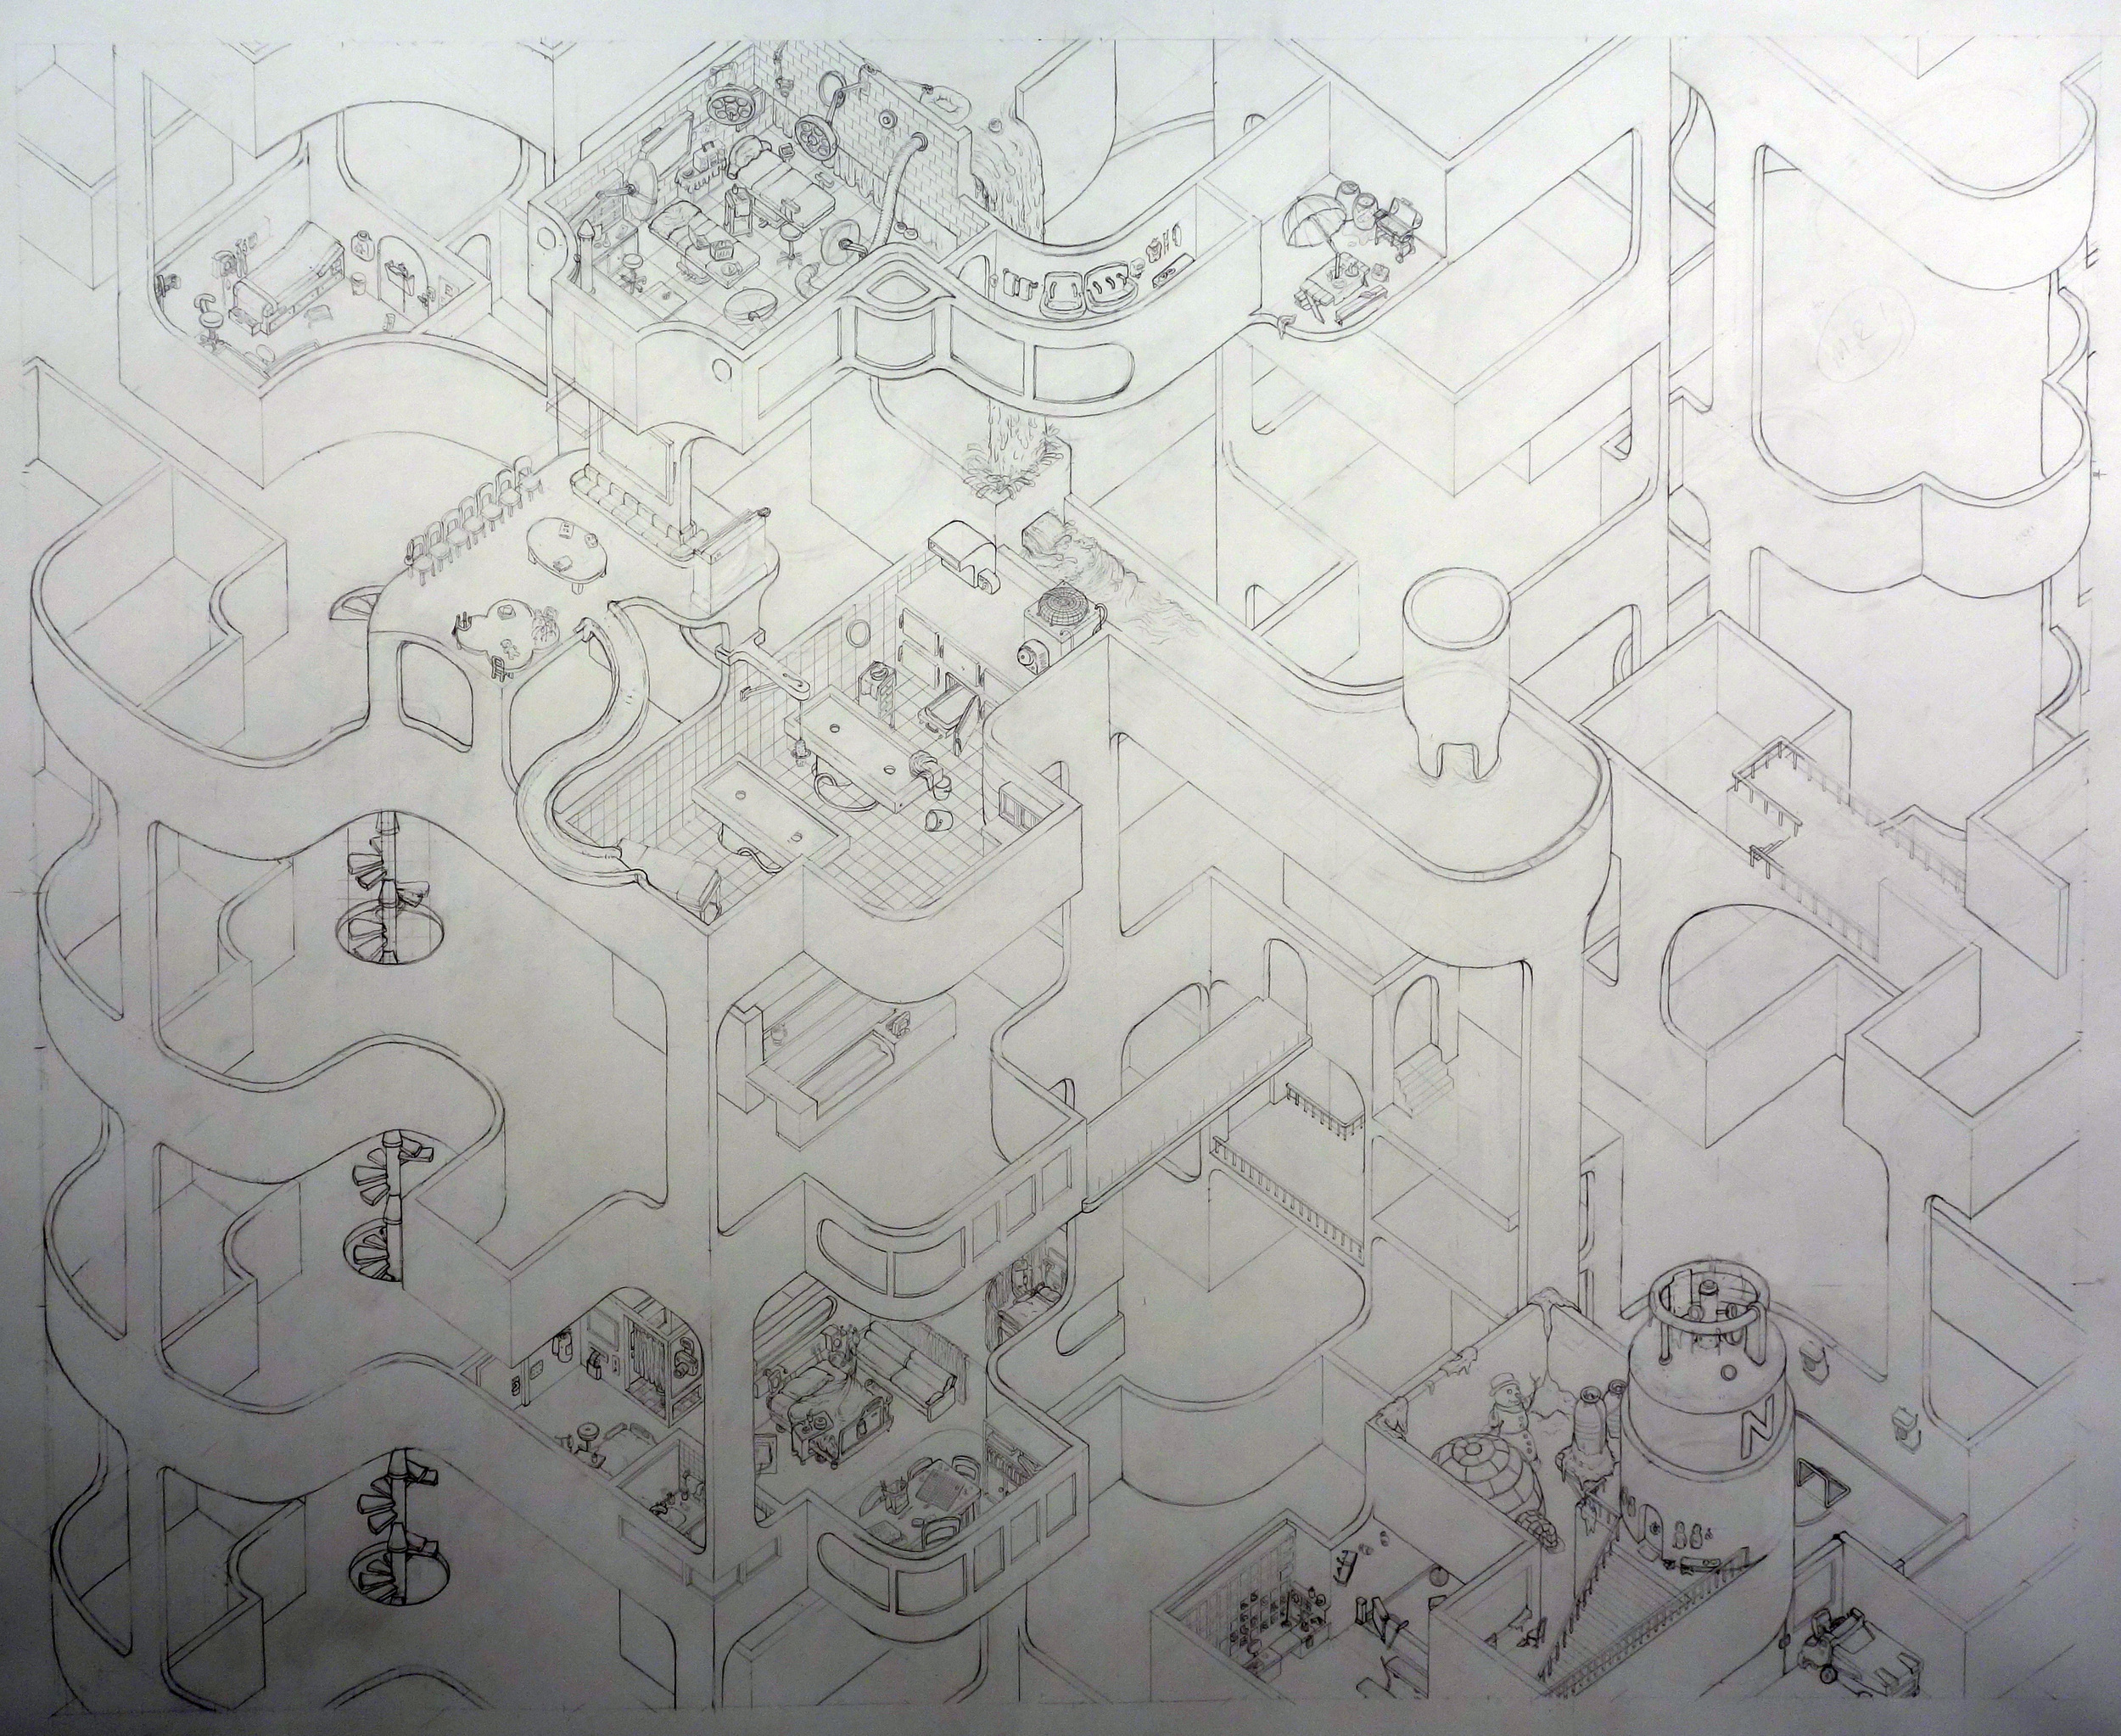
PencilWalls and basic structure have been established. The hardest part is making it look spacially sensical. It's easy to make these look weird (Escher-like). It's hard for all the walls and floors to follow logical patterns that we're used to seeing. The spiral staircase is the hardest, biggest pain in the ass to draw. And I knew I wanted it somewhere in the drawing so I drew it first, with minimal distractions.
PencilFilling in some rooms: hospital beds for patients, liquid nitrogen tank with ice skating rink below.
PencilFilling in more rooms: surgical theater (double tables), pathology lab (double tables) with morgue fridge, exam room and picnic terrace with grill.
PencilFilling in MRI facility, NICU, cafeteria, waterfall and scrub station for surgical theater. Added helicopter landing pad.
PencilMore details filled in, like extended top floor for a trampoline, waiting rooms and other stuff.
PencilAdded another tube slide for balance and hospital guest enjoyment, filling in details.
InkFirst layer of ink is drawn over pencil and remaining graphite is erased.
InkSecond and third layers of ink are drawn - mostly upside-down so that each ink line is smooth on both sides. I use an old fashioned Gillott 290 dip pen nib and one side is usually jagged so I have to draw each line at least twice to smooth it out. This also makes each line more interesting since the width with then vary throughout the whole composition (compare that with the sterility of a line drawn with a more modern technical pen)
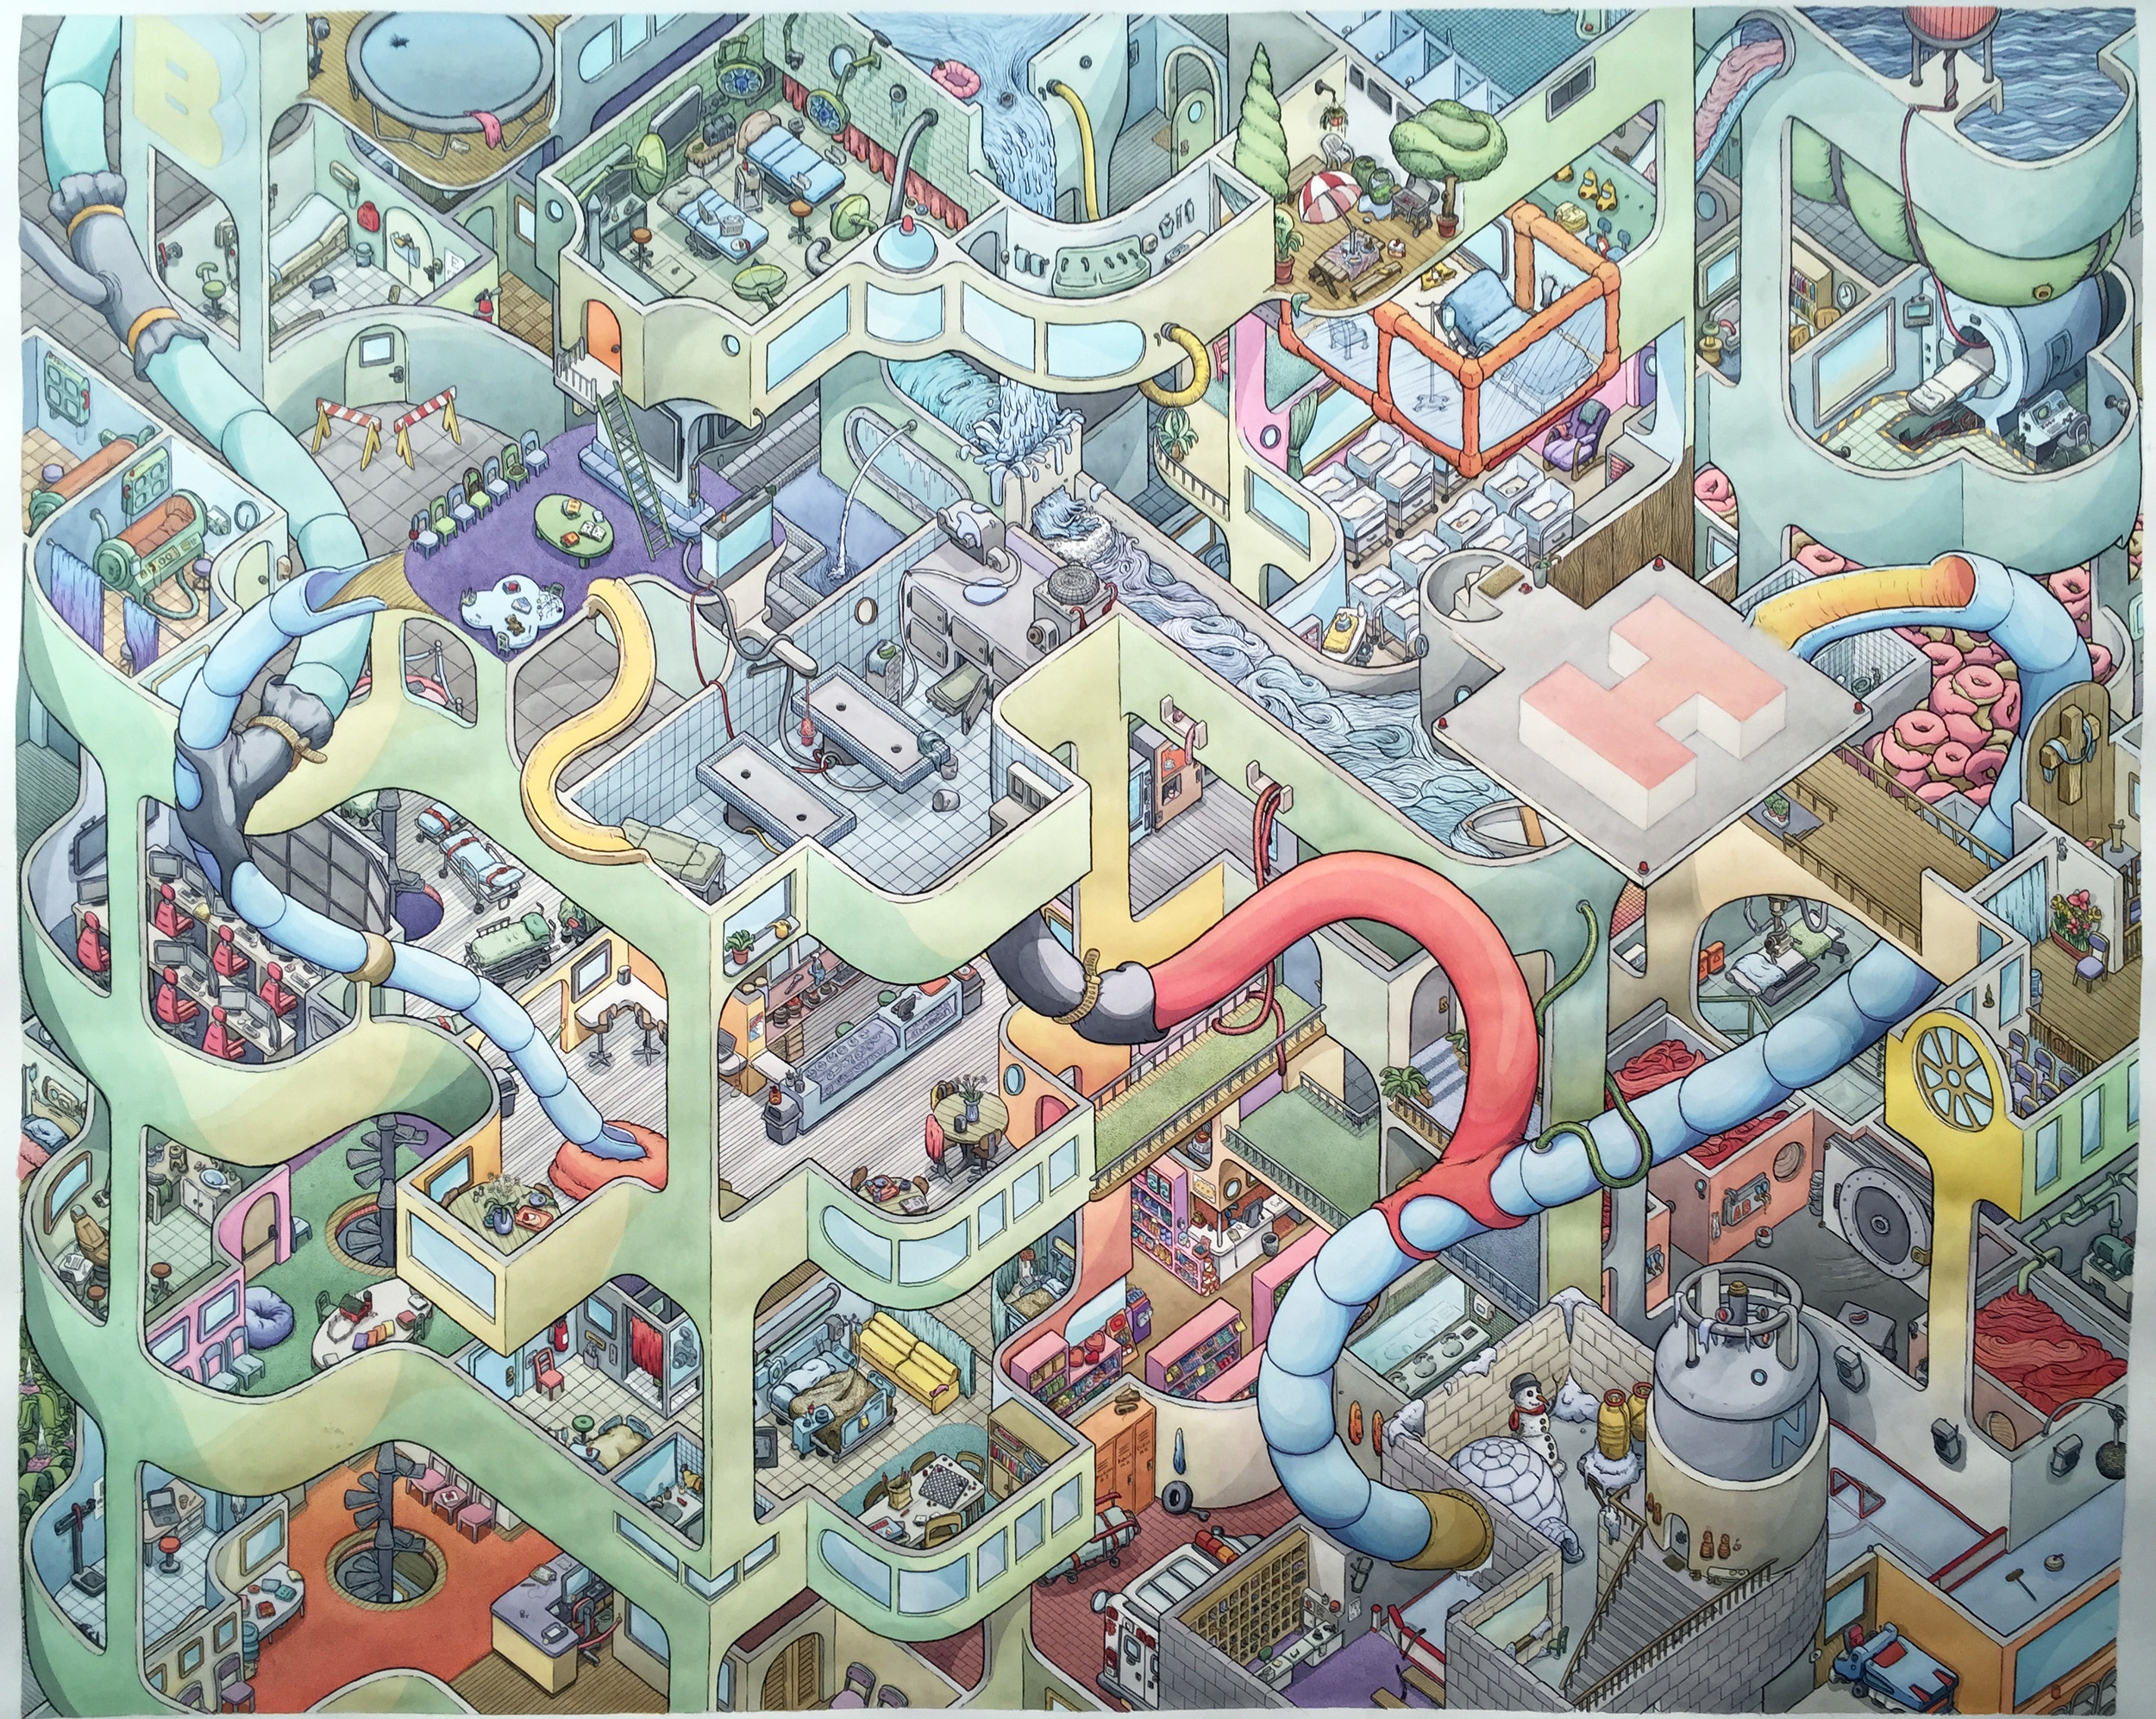
WatercolorThis is a super tedious part of the drawing - mostly because I'm getting really anxious to see it finished (plus I want to move onto something else). Almost all areas of color will have a minimum of 5 layers - some up to 30 layers of light color washes that need to dry and be painted over again until a satisfactory color saturation and depth illusion is reached.
WatercolorMore layers. I'm not sure if I should have painted that slide connection part red but there's no turning back now! Once a basic color is applied - there's nothing I can do to change it. One weird thing I'm trying with Big Hospital that I've not done in the past it to paint the whole think vertical as it hangs pinned to a wall. In the past I would typically drape the huge piece of paper over a large tilted table, being very careful not to lean on the paper and cerase it (nor spill anything on it). When painting on a wall have to be more careful than normal about how much water each brush stroke contains so you don't drip down the paper since gravity is acting more directly on the wet media this way.
Filling everything in that wasn't before and reacting to adjacent colors. Cooling and warming different planes with watercolor washes before the final push to finish the whole damn thing.
Final touchesThere are seemingly infinite adjustments to color at this stage. Light watercolor washes of yellow, red or blue (and every color in between) can make a big difference in terms of depth perception to the viewer. It helps to make the whole composition pop.
so closeLast one after details were added before having it professionally shot for a print.
info
/
1
2
3
4
5
6
7
8
9
10
11
12
13
14
15
16
·
·
·
·
·
·
·
·
·
·
·
·
·
·
·
·
